
Technical guide · NEXTEKCI School
Poultry feed and water guide
The right feed at the right age, stored properly, and clean, cool water at all times
Benchmarks: Cobb 500, Efficiency Plus (Hubbard), Hubbard Premium, Novogen Brown
Download the guide (PDF)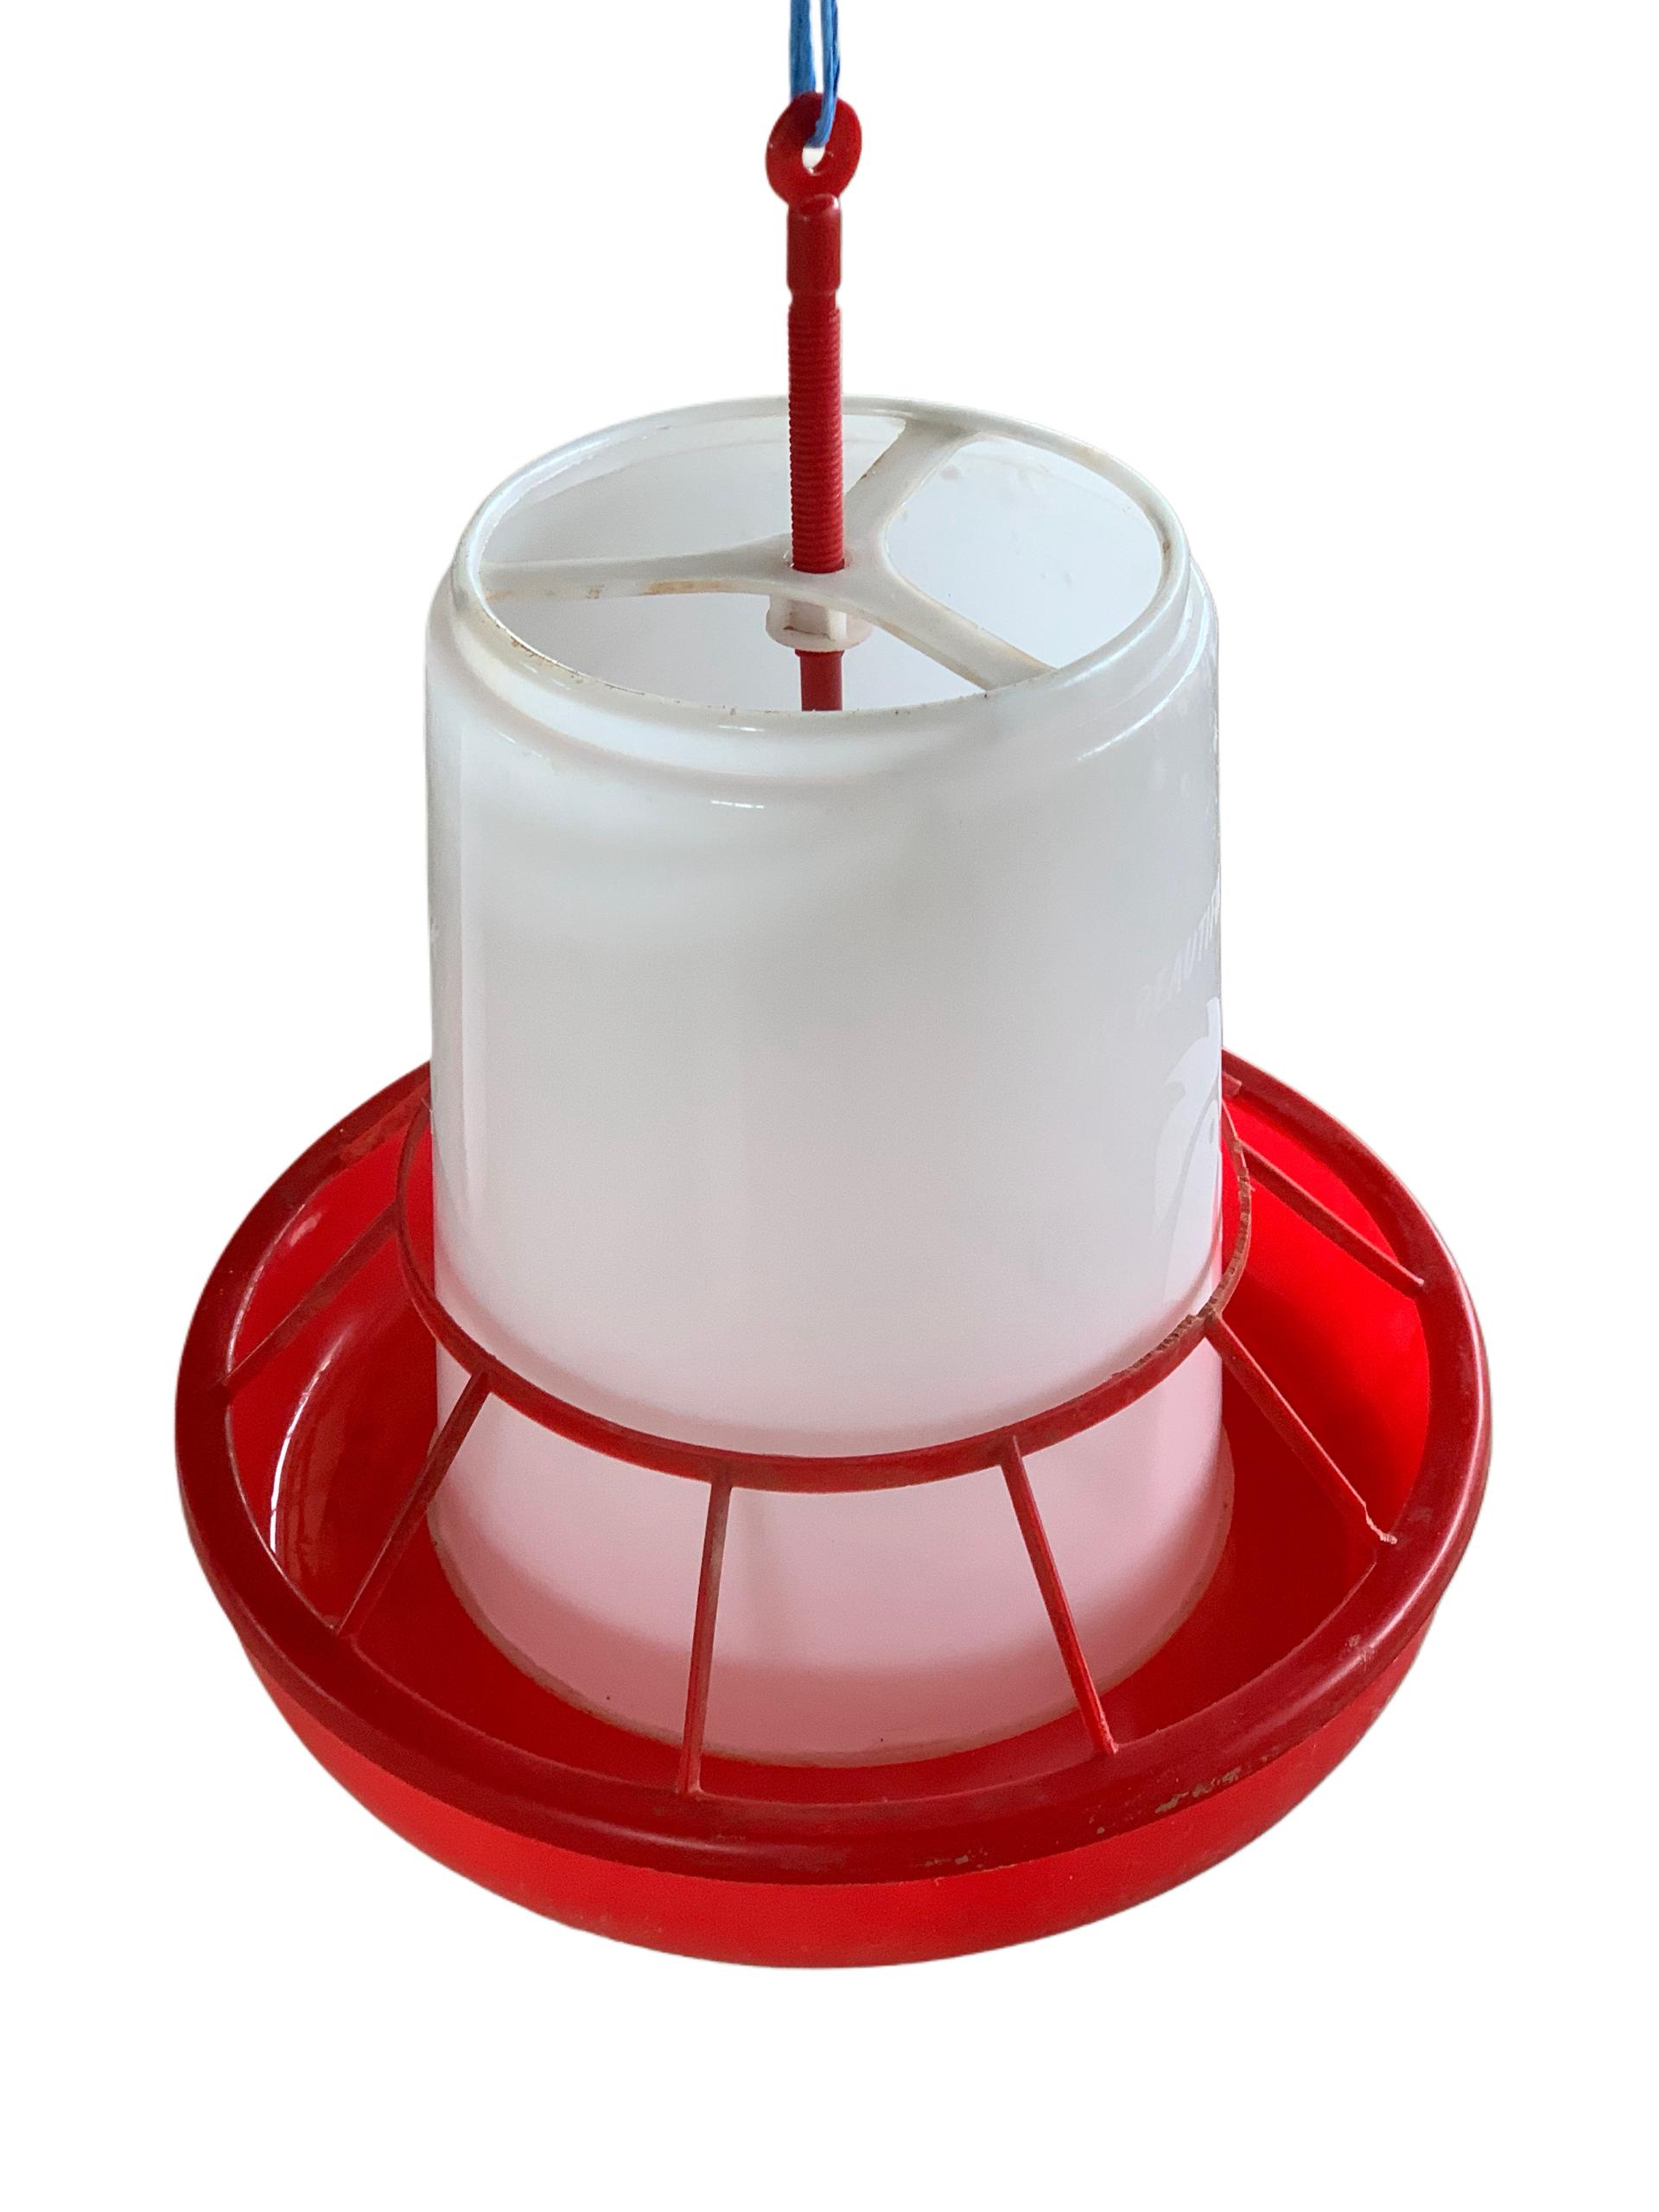
1. Feed phases
Feed is the biggest cost of the flock and the first lever for results. A bird’s needs change with age: the young chick needs a protein-rich feed to build its gut, skeleton and muscles; later it needs more energy and less protein. That is why several feeds are given one after another, one per phase.
White broilers
| Phase | Age | Form | Purpose |
|---|---|---|---|
| Starter | 0 to 10-14 days | Fine crumbles | Build the gut and skeleton; protein-rich feed |
| Grower | 15 to 28 days | Small pellets or coarse crumbles | Develop muscle |
| Finisher | 29 days to sale | Pellets | Finish the weight: more energy, less protein |
Coloured chickens and hybrids, which are kept longer, follow the same three phases, but longer ones: starter until about 3 weeks, grower until 8 to 10 weeks, then finisher. Follow the changeover ages advised by your feed manufacturer for your type of chicken and your selling age.
Brown laying hens
| Phase | Age | Purpose |
|---|---|---|
| Pullet starter | 0 to 6 weeks | A good start, building the skeleton |
| Grower (pullet) | 6 to 12-14 weeks | Produce a pullet at the right weight and uniform |
| Pre-lay (developer) | 14 to 18 weeks, until the first eggs | Prepare the hen’s body for laying |
| Layer | From the first eggs (around 19 to 20 weeks) | Produce eggs; calcium-rich feed for the shell |
Each feed is made for an age. A finisher feed given to chicks deprives them of the protein they need. A layer feed given too early damages the pullet’s kidneys with its calcium; given too late, it leads to fragile shells.
A bird’s needs do not change all at once on a given date: they decline little by little. The more different feeds you give, the more closely you follow its needs; in practice, three feeds for broilers and four for layers are a good compromise.
2. Mash, crumbles or pellets
The same feed can be presented in several ways. Feed form matters as much as composition: a good feed in the wrong form gets sorted, wasted or poorly eaten.
The three feed forms
| Form | What it is | For whom | Points to watch |
|---|---|---|---|
| Mash | Raw materials ground and mixed | Common for pullets and laying hens | Birds pick out the large pieces and leave the powder; more dust and waste |
| Crumbles | Pellets broken into small pieces | Starter for all chicks | Every crumble contains the whole feed: the chick cannot pick and choose |
| Pellets | Feed pressed into small cylinders | Broiler grower and finisher | Eaten quickly, little waste; a lot of powder at the bottom of the bag = poor-quality pellets |
- Processed feeds (crumbles, pellets) are easier to handle than mash.
- They give better growth and a better feed conversion ratio than mash.
- At the start, feed should be a good-quality crumble.
Source: Cobb (Broiler Management Guide)
With mash feed, let the feeders empty once a day, around midday: the birds then eat the fine powder, which often holds the minerals and vitamins, instead of choosing only the large pieces.
3. Raw materials and what they do
A complete feed supplies five things: water (which the bird drinks), energy, protein (in fact amino acids, the “building blocks” of muscle and feathers), minerals and vitamins. These must all be present together and in the right balance: if one is missing, the others are poorly used.
What supplies what
| Need | Purpose | Common raw materials |
|---|---|---|
| Energy | Keep the bird alive and make it grow | Maize (the basis of most feeds), sorghum, cereal brans and by-products, oils |
| Protein | Build muscle, feathers and eggs | Soybean meal (the most widely used), other oilseed meals, fishmeal |
| Major minerals | Bones, eggshell, body balance | Limestone and shells (calcium), phosphates (phosphorus), salt (sodium and chlorine) |
| Trace minerals | Needed in very small amounts | Iron, iodine, copper, manganese, zinc, selenium, supplied by the premix |
| Vitamins | Growth, immunity, strong legs, laying | Vitamins A, D, E, K and B-group vitamins, supplied by the premix |
Source: Cobb (Broiler Management Guide)
The premix is a concentrated blend of vitamins, trace minerals and sometimes amino acids, added in small amounts. It is small in volume but essential: without it, even a feed rich in maize and soya produces birds that grow poorly, have leg problems or lay badly. Laying hens also receive a lot of calcium, which the eggshell needs.
If you make your own feed on the farm
- Use a formula drawn up by a nutritionist for the age and type of bird; do not copy your neighbour’s formula.
- Weigh every raw material: never “by the bucket” or “by eye”.
- Mix for long enough to spread the premix and minerals throughout: a few grams poorly mixed give deficient birds next to birds that get too much.
- Never replace one raw material with another without reworking the formula.
- Use only dry, clean raw materials, free of mould and insects.
- Never feed maize on its own: it lacks protein, minerals and vitamins. Cracked maize can supplement the finisher feed of coloured chickens, never at the starter stage.
Making feed is a trade that requires checked raw materials, an accurate formula and consistent mixing. NEXTEKCI holds the official approval for poultry feed manufacturing.
4. Feed quality and storage
A good feed can turn bad in a bad store. The heat and humidity of Côte d’Ivoire, especially in the rainy season, make feed lose its vitamins and encourage mould. Some moulds produce poisons, mycotoxins (including aflatoxins, common in maize that has been poorly dried or stored): they damage the liver, slow growth, weaken the birds’ defences and can kill.
The feed store
- A room separate from the bird house, closed, dry, ventilated, sheltered from rain.
- Bags on pallets or planks, about 20 cm from the floor and the walls, so that air circulates and damp does not rise.
- First in, first out: write the date of receipt on each bag and use the oldest first.
- Beyond 4 to 6 weeks of storage, especially in the rainy season, feed loses its vitamins and mould takes over: do not buy too far ahead.
- Rats and mice: traps and baits around the store, no open bags, floor swept every day, spilt feed cleaned up straight away.
- A safety stock of about one week: a cut-off road or a late delivery must not starve the flock.
If you use feed bins
- Capacity of about 5 days’ consumption.
- Bins must be completely watertight: the slightest leak makes the feed go mouldy.
- Two bins per house make it possible to change feed quickly when needed.
- Bins emptied and cleaned between flocks.
Source: Cobb (Broiler Management Guide)
Checking each delivery
- 1Check that the label matches the order: type of feed, phase, date of manufacture.
- 2Check the bags: intact, dry, no signs of water, rats or insects.
- 3Open a bag: normal smell, usual colour, no lumps, not warm, little powder in a pelleted feed.
- 4Take a sample from several bags (5 sub-samples mixed together) rather than a handful from the feeder.
- 5Keep it cool, in a closed bag, labelled with the date, type of feed and delivery note number, until the flock is sold.
Source: Cobb (Broiler Management Guide)
A bag that is mouldy, warm, smells musty or has lumps is never fed, not even “a little” and not even mixed with a good bag: toxins do not go away in the sun or through a sieve. Put it aside and have the supplier take it back. Note that feed can contain toxins without any visible mould; the sample you kept means it can be analysed if the flock has a problem.
5. Feeding properly
A good feed is useless if it is not available to every bird, at all times. If feeder space is short, growth slows and the flock becomes uneven: the strong eat, the weak wait.
How much feeder space
| Type of feeder | Guideline |
|---|---|
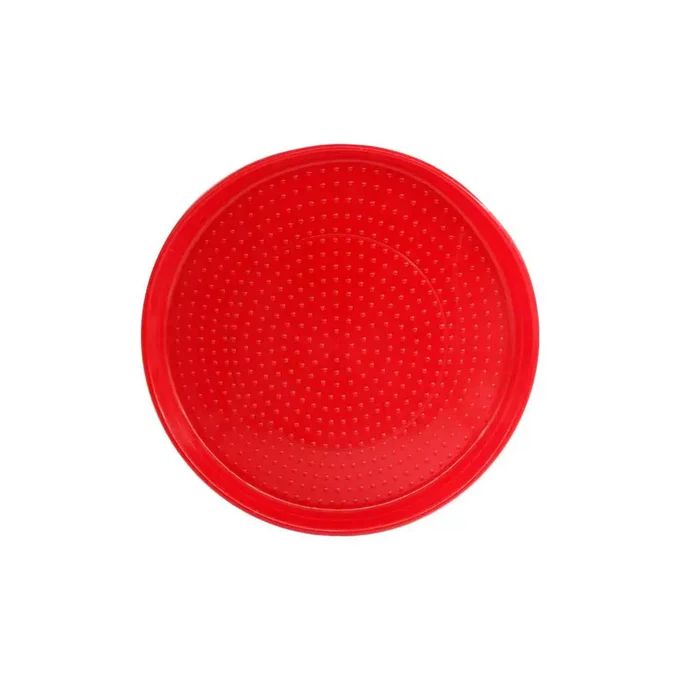
| Brooding (paper or trays) | 1 tray per 50 chicks; 50 to 65 g of feed per chick on the paper, topped up 3 times a day, for 7 to 10 days |
| Hanging manual feeders (hoppers) | 1 per 40 to 50 birds |
| Automatic pans (33 cm diameter) | 60 to 70 birds per pan |
| Automatic chain feeder | At least 2.5 cm per bird, counting both sides |
Source: Cobb (Broiler Management Guide)
Good habits
- Feeder lip at the height of the birds’ backs, raised every week as they grow.
- Feeders never empty, but never filled to the brim: above one third, birds scratch and flick feed out, and waste can reach 5 to 10% of the feed.
- During brooding, feed must never run out on the paper or trays, and must never sit directly under the heat source.
- Feeders and drinkers alternated, so that no bird has far to go.
- In strong heat: raise the feeders about 6 hours before the hottest time of day, then feed again when it is cooler (in the evening and early morning).
Changing feed over three days
| Day | Old feed | New feed |
|---|---|---|
| Day 1 | Two thirds | One third |
| Day 2 | Half | Half |
| Day 3 | One third | Two thirds |
| Day 4 | — | All new feed |
Every change (of phase, supplier or form) is a delicate moment: the flock may shun the feeder and drink less. Never change supplier in the middle of a phase just because an opportunity comes up, and ask what has changed when a bag arrives with a different colour or smell.
6. How much feed by age
The following tables give the targets of the reference strains, achieved in very good conditions. In an open-sided house, in strong heat, actual intake is often lower. Use them to plan your bags and to compare, every day, what your flock is eating.
White broilers (Efficiency Plus strain)
| Age | Feed per day | Cumulative feed per bird |
|---|---|---|
| 7 days | 35 g | 172 g |
| 14 days | 70 g | 550 g |
| 21 days | 112 g | 1,203 g |
| 28 days | 152 g | 2,148 g |
| 35 days | 188 g | 3,359 g |
| 42 days | 214 g | 4,783 g |
| 49 days | 230 g | 6,350 g |
Efficiency Plus — performance objectives (Hubbard)
White broilers (Cobb 500, mixed males and females)
| Age | Cumulative feed per bird | Feed conversion ratio (FCR) |
|---|---|---|
| 28 days | 2.36 kg | 1.32 |
| 35 days | 3.64 kg | 1.44 |
| 42 days | 5.10 kg | 1.56 |
| 45 days | 5.78 kg | 1.61 |
Source: Cobb (Cobb500 Performance & Nutrition Supplement, 2022)
Coloured chickens: feed per day
| Age | Red broilers | Hybrids |
|---|---|---|
| 14 days | 49 g | 32 g |
| 28 days | 99 g | 65 g |
| 42 days | 127 g | 83 g |
| 56 days | 162 g | 106 g |
| 70 days | 193 g | 126 g |
| 84 days | 214 g | 140 g |
Indicative Hubbard Premium performance
Coloured chickens: total feed per bird by selling age
| Selling age | Red broilers | Barred grey | Naked-neck red broilers | Hybrids |
|---|---|---|---|---|
| 56 days | 5.1 kg | 4.8 kg | 5.0 kg | 3.4 kg |
| 63 days | 6.3 kg | 5.9 kg | 6.2 kg | 4.1 kg |
| 70 days | 7.7 kg | 7.2 kg | 7.5 kg | 5.0 kg |
| 84 days | 10.5 kg | 9.9 kg | 10.3 kg | 6.9 kg |
Indicative Hubbard Premium performance
Brown laying pullets: feed per day
| Age | Feed per day | Target weight |
|---|---|---|
| 1 week | 11 g | 65 to 70 g |
| 2 weeks | 17 g | 110 to 120 g |
| 4 weeks | 35 g | 270 to 285 g |
| 6 weeks | 47 g | 470 to 495 g |
| 8 weeks | 55 g | 660 to 695 g |
| 10 weeks | 60 g | 840 to 900 g |
| 12 weeks | 65 g | 1,020 to 1,090 g |
| 14 weeks | 72 g | 1,190 to 1,255 g |
| 16 weeks | 78 g | 1,350 to 1,425 g |
| 18 weeks | 85 g | 1,480 to 1,580 g |
Source: Novogen Brown, management guide (2024), p. 38
In full production, a brown laying hen eats about 111 to 119 g of layer feed a day.
To work out the day’s ration, multiply the number of birds by the feed per day in the table. Example: 1,000 white broilers aged 28 days × 152 g = about 152 kg of feed a day, roughly 3 bags of 50 kg. If your flock eats clearly less, check the heat, the water and the birds’ health; if it eats as much but does not gain weight, look for waste, rats or a disease starting.
Your flock’s feed conversion ratio is calculated at the end: feed consumed (feed delivered minus the stock left over) divided by the total liveweight sold. Dead birds have eaten without being sold: the more deaths, the higher the ratio.
Work out the profitability of your flock with your own prices7. Water: how much birds drink
Water is the bird’s first nutrient: it makes up 65 to 78% of its body depending on age. A broiler drinks about 1.6 to 2 times the weight of the feed it eats, and much more when it is hot. A bird that drinks poorly eats poorly: many “feed problems” are really water problems.
Water follows the heat
| House temperature | Litres of water per 1 kg of feed |
|---|---|
| 20 °C | 2 litres |
| 26 °C | 2.5 litres |
| 37 °C | 5 litres |
Source: Cobb (Broiler Management Guide)
- Between 20 and 32 °C, each extra degree increases water intake by about 6%.
- Between 32 and 38 °C, each extra degree increases it by about 5%.
- Above 20 °C, each extra degree lowers feed intake by about 1.2%.
Source: Cobb (Broiler Management Guide)
White broilers: water per day in good conditions (Efficiency Plus strain)
| Age | Water per bird per day | Per 1,000 birds |
|---|---|---|
| 7 days | 60 ml | 60 litres |
| 14 days | 119 ml | 119 litres |
| 21 days | 190 ml | 190 litres |
| 28 days | 259 ml | 259 litres |
| 35 days | 319 ml | 319 litres |
| 42 days | 364 ml | 364 litres |
| 49 days | 391 ml | 391 litres |
Efficiency Plus — performance objectives (Hubbard)
Coloured chickens: water per day in good conditions
| Age | Red broilers | Hybrids |
|---|---|---|
| 14 days | 83 ml | 54 ml |
| 28 days | 169 ml | 110 ml |
| 42 days | 216 ml | 141 ml |
| 56 days | 275 ml | 179 ml |
| 70 days | 329 ml | 215 ml |
| 84 days | 364 ml | 238 ml |
Indicative Hubbard Premium performance
Laying hens in production
| Temperature | Litres of water per 1 kg of feed | Water per hen per day |
|---|---|---|
| 20 °C | 1.8 | 205 ml |
| 25 °C | 2.1 | 230 ml |
| 30 °C | 3.1 | 320 ml |
Source: Novogen Brown, management guide (2024) (after ITAVI 2012), p. 18
These amounts apply in good conditions: in strong heat, birds can drink up to 3 times what they eat. Plan a water reserve that covers at least 48 hours of peak consumption, to keep going during a pump failure or a power cut.
Record the water drunk every day, at the same time (meter, or number of drinkers filled). It should rise steadily with age. A drop without any fall in temperature is often the first sign of a problem, before mortality. A sudden rise means looking for a leak, strong heat or feed that is too salty.
8. Water quality
The water given to birds must be fit for human consumption. Clear water is not necessarily clean water: it can carry germs, too much salt, iron or nitrates. Poor-quality water reduces drinking, fouls the drinkers and makes birds ill.
Protecting the source
- Borehole: the best solution when properly built; have the water tested at least once.
- Well: covered, away from latrines and pits, watched closely in the rainy season (seepage).
- Mains supply: reliable water, but the 48-hour reserve is still essential.
- River, pond, rainwater: avoid without treatment.
Guidelines for good-quality water
| Item | Normal level | Maximum acceptable level |
|---|---|---|
| Total bacteria | 0 per ml | 100 per ml |
| Coliforms (faecal bacteria) | 0 per ml | 50 per ml |
| pH | 6.8 to 7.5 | 6.0 to 8.0 |
| Nitrates | 10 mg/L | 25 mg/L |
| Iron | 0.2 mg/L | 0.3 mg/L |
| Sodium | 32 mg/L | 50 mg/L |
Source: Cobb (Broiler Management Guide)
Dissolved salts in water
| Dissolved salts (ppm) | What it means |
|---|---|
| Less than 1,000 | Suitable for all poultry |
| 1,000 to 2,999 | Suitable; droppings sometimes wetter at the higher levels, with no effect on health |
| 3,000 to 4,999 | Not suitable: wet droppings, higher mortality, poorer growth |
| 5,000 to 6,999 | Not suitable: almost always causes problems |
| 7,000 and above | Unfit for poultry |
Source: Cobb (Broiler Management Guide), after National Research Council (1974)
What a water test helps you correct
- Iron and manganese: give a bitter taste that reduces drinking, and feed bacteria. A filter (40 to 50 micron mesh), checked and cleaned every week, and chlorination help.
- Calcium and magnesium (“hard” water): form scale that blocks nipple drinkers.
- Nitrates: even at low levels they hold back performance; they often point to contamination by sewage or fertiliser.
- pH above 8: bitter taste and chlorine with almost no effect.
Source: Cobb (Broiler Management Guide)
Chlorine works better in slightly acidic water
| Water pH | Share of chlorine that actually disinfects |
|---|---|
| 8.0 | 21% |
| 7.5 | 48% |
| 7.0 | 72% |
| 6.5 | 90% |
| 6.0 | 96% |
Source: Cobb (Broiler Management Guide)
Have the water tested at least once a year by an accredited laboratory, with two samples: one at the source and one at the end of a drinker line, in a sterile container. Know your water’s pH before treating it. To correct the pH or chlorinate the water, ask the vet or technician for advice: never improvise a dose.
9. Drinkers, water lines and water temperature
A slimy layer, called biofilm, builds up inside pipes and drinkers: it is a layer of bacteria where dangerous germs hide from disinfectants and feed. Regular cleaning is the only way to stop it taking hold.
How many drinkers
| Drinker | Number | Height |
|---|---|---|
| Brooding (mini-drinkers, founts) | 14 to 16 per 1,000 chicks, about 1 per 80 to 100 chicks | On the litter for the first days, then slightly raised |
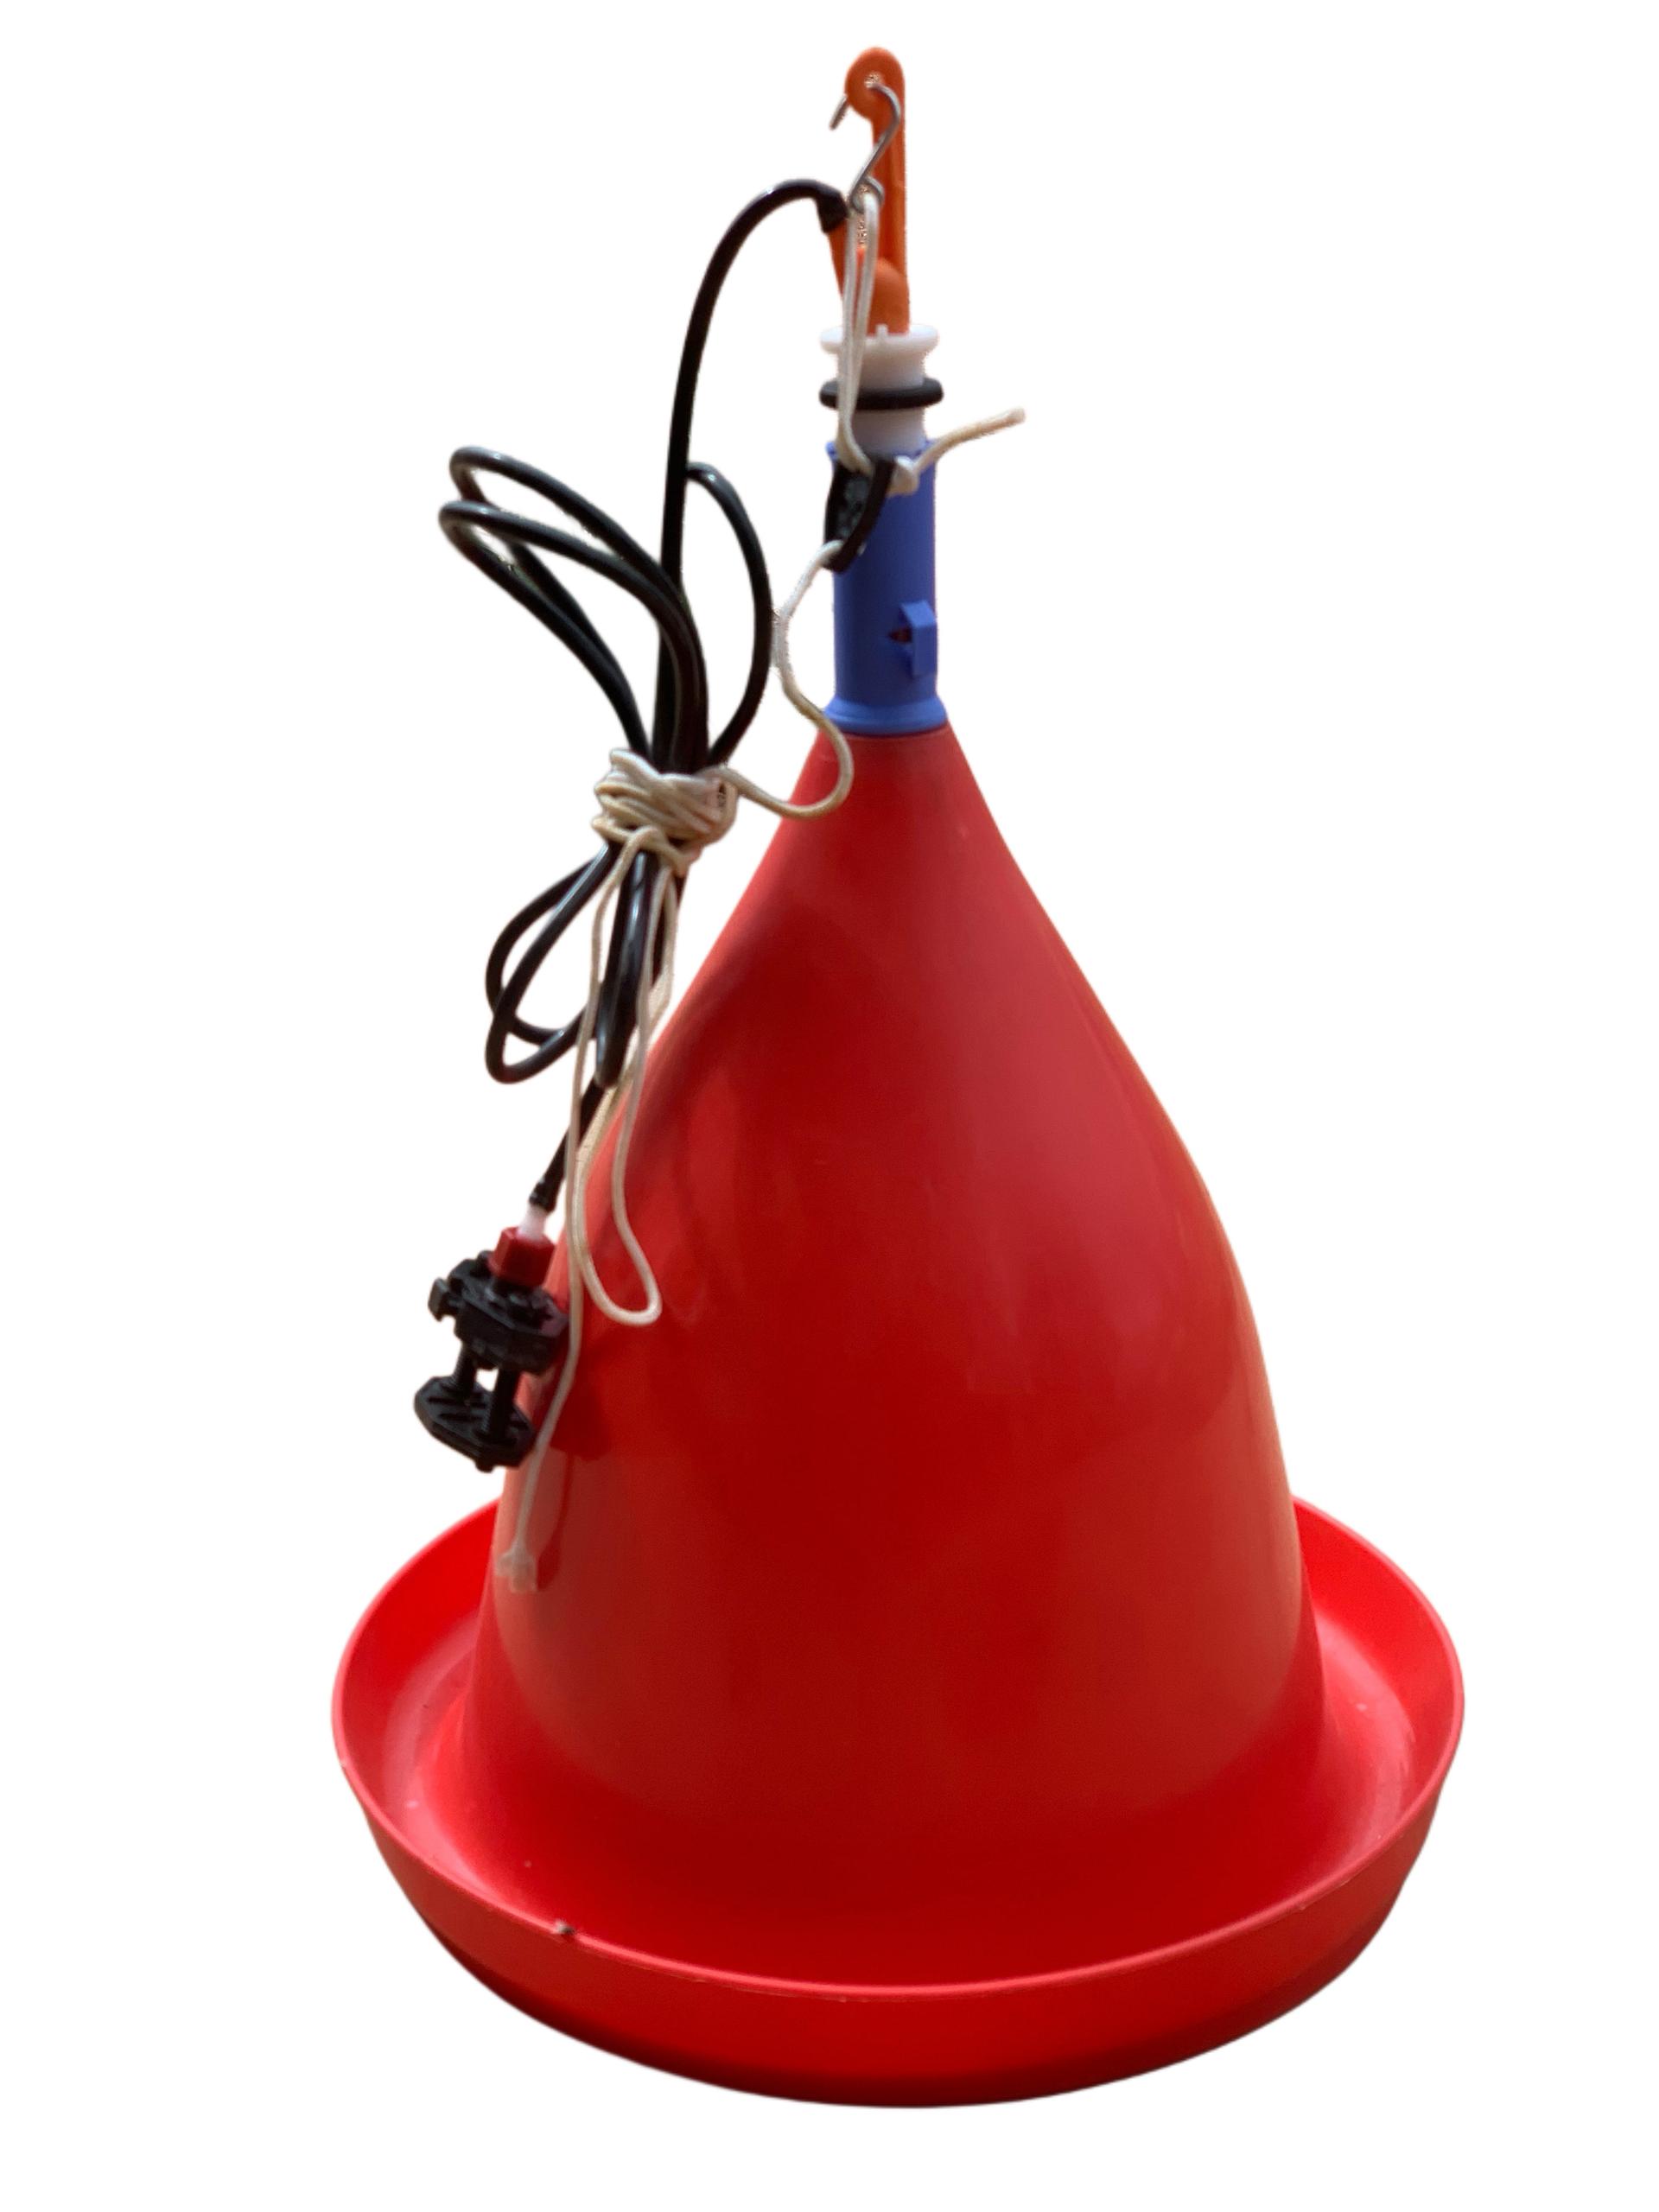
| Bell drinker (hanging) | 1 per 80 to 100 birds | Lip at back height; 1 to 2 cm of water |
| Nipples (broilers) | 1 per 10 to 12 birds | At chick eye level, then just above the head |
| Nipples (laying hens) | 1 per 10 hens at 30 °C (1 per 20 at 25 °C) | Just above the head |
Maintenance during the flock
- Open drinkers (founts, bells) scrubbed every day with a brush.
- Nipple lines flushed at high pressure (1 to 2 bar), ideally every day and at least 3 times a week.
- No bird should have to walk more than 3 m to drink.
- Drinkers raised every week as the birds grow; a ring of wet litter = drinker too low, pressure too high or a leak.
- Water filter checked and cleaned every week.
Source: Cobb (Broiler Management Guide)
Cleaning the water system between flocks
- 1Drain the system and the tank.
- 2Take the tank out if possible and scrub it.
- 3Prepare the cleaning solution following the manufacturer’s instructions; wear gloves and eye protection.
- 4Pour the solution into the tank, open the end of each line until the solution comes through, then close it.
- 5Leave the solution to act for at least 12 hours if it cannot circulate.
- 6Drain, then flush thoroughly with clean water to remove the biofilm and the product before the chicks arrive.
Source: Cobb (Broiler Management Guide)
Cool water
- Birds refuse water that is too warm: above 30 °C, intake drops. Between 18 and 25 °C is good; cooler is better still.
- Tanks in the shade or painted white, pipes buried or covered: a black pipe in the sun gives scalding water by midday.
- In the hottest hours, empty the lukewarm water from drinkers and replace it with cool water from the reserve.
- When the chicks arrive, water at room temperature (about 20 to 25 °C), neither cold nor hot.
Vitamins, vaccines, medicines: any product goes into the water only on the vet’s prescription, at the dose and for the duration they set. Prepare only the water the flock will drink in 2 to 4 hours, and never put chlorine or bleach in the water on a vaccination day: the disinfectant kills the vaccine.
10. Signs of a feed or water problem
A feed or water problem shows first on the record sheet (intake, growth), then in the droppings and the birds’ behaviour. This table helps you look for the cause; it does not replace the vet’s opinion when birds are sick or dying.
What you see, what to check
| What you see | Possible causes | What to do |
|---|---|---|
| Birds eat less | Heat, too little or too warm water, new feed refused, spoiled bag, disease starting | Check the water and the heat, open and smell the bag; call the vet if it lasts |
| Feed disappears but birds do not gain weight | Waste, rats, badly adjusted feeders, disease | Adjust the feeders, control rats, weigh a sample of birds |
| Water intake jumps suddenly | Leak, strong heat, feed or water too salty | Find the leak, check the feed and the water test |
| Very wet droppings across the flock | Too much salt or dissolved salts in the feed or water, digestive problem | Keep a feed sample, have the water tested, call the vet |
| Undigested feed in the droppings | Digestive disorder, poor-quality feed | Call the vet, keep a sample |
| Uneven flock, slow growth | Too little feeder space, wrong feed phase, poor feed quality, water | Count feeders and drinkers, check the bag in use |
| Lameness, weak legs | Mineral or vitamin imbalance, growth too fast, disease | Call the vet; report to the supplier with the sample |
| Thin shells, drop in laying | Too little calcium, layer feed started too late, heat, change of feed, disease | Check the layer feed; vet within 24 hours |
| Mortality rising after a new batch of feed | Mycotoxins, manufacturing error | Stop that batch, call the vet and the supplier |
If you suspect the feed
- 1Stop the suspect batch and, if possible, go back to the previous batch that was working well.
- 2Keep the delivery sample, the bag label and the delivery note.
- 3Write on the record sheet what changed: date of the new batch, intake, water, deaths.
- 4Call the vet in your area, with the record sheet, photos and the sample.
- 5Inform the supplier: they must take back spoiled bags and can have the feed analysed.
11. Common mistakes
The costliest mistakes
| Mistake | What it costs | Good practice |
|---|---|---|
| Giving finisher or layer feed too early | Slower growth, damaged kidneys in pullets | One feed per phase, at the right age |
| Changing feed all at once | Flock shuns the feeder, growth lost | Three-day changeover |
| Changing supplier mid-phase for a one-off opportunity | Days of growth lost | Change at the start of a phase, after asking questions |
| Feeding maize alone, or at the starter stage | Protein, mineral and vitamin deficiencies | Complete feed; maize only as a finisher supplement |
| Storing bags on the floor, against the wall or in the bird house | Damp, mould, rats | Separate dry store, pallets, first in first out |
| Feeding a mouldy bag “so as not to waste it” | Mycotoxins: damaged liver, deaths | Bag set aside and taken back by the supplier |
| Filling feeders to the brim or setting them too low | Up to 5 to 10% of feed wasted | Fill to one third, lip at back height |
| Leaving feeders or drinkers empty | Growth lost, uneven flock | Check on every round |
| Letting water heat up in the sun | Birds drink and eat less | Tanks in the shade, pipes covered, water renewed |
| Dirty drinkers, lines never flushed | Biofilm, digestive diseases | Daily washing, flushing at least 3 times a week |
| Putting products in the water “just in case” | Resistance, confused diagnosis, residues | Only on the vet’s prescription |
| Not recording water and feed | Problems spotted too late | Record sheet filled in every day, at the same time |
The most profitable check on the farm: count the bags. Bags received minus bags fed out equals bags in stock. Do it every week, yourself.
12. Feed and water checklist
Every day
- Record the feed given and the water drunk, at the same time, and compare them with the day before and with the tables.
- Wash the open drinkers; check that every nipple delivers water.
- Check the feeders: never empty, never full to the brim, at the right height.
- In the hottest hours: cool water renewed, feeders raised.
- Look at the litter around the drinkers and at the droppings.
Every week
- Raise feeders and drinkers as the birds grow.
- Flush the water lines (at least 3 times a week); clean the filter.
- Count the bags in stock and plan the next delivery and the next feed change.
- Weigh a sample of birds and compare with the targets.
At each feed delivery
- Check the label, the bags and the look of the feed.
- Write the date of receipt on the bags and stack them on pallets.
- Keep a sample until the flock is sold.
Between two flocks
- Empty the remaining feed, clean the store, the feeders and the bins.
- Clean the tank and the water system, then flush thoroughly.
- Have the water tested at least once a year (source and end of line).
Need advice?
Our advisers answer on WhatsApp: +225 05 44 83 27 79 (information) · +225 07 07 72 78 67 (chick orders).